A comprehensive introduction to Containers from a Laravel/PHP Developer
Docker when it first came out felt to me like an unnecessary complexity. Why would you need multiple containers if you can install all those tools directly from package repositories. I never wanted to use it because, as a full stack developer I use multiple tools to get things done and Docker is more for people that need one tool (If you use containers properly, never use one container to do multiple things) to get their job done. While this is true, Containers come with a huge benefit during deployment which is Auto Scaling and being able to easily deploy in serverless infrastructure like Google Cloud Run and Amazon Lambda. Another advantage of using containers is to be able to develop the right way in windows. I hate using Windows for anything other than gaming but I like the screen real estate on my PC especially during lockdown. This has become another motivation to learn to use Docker.
After spending a full year on and off trying Docker, I feel like I got the hang of it now and just installed a fresh copy of Windows 11 with the aim of not installing any tool related to development and work on my projects. As a Laravel developer I know that Laravel Sail can easily help me with this but I want to do it the hard way so I can comfortably deploy in production. I will continue with series as if I am working on an existing project. I will cover this series from a high level perspective with regards to Full Stack Development and dive deeper when using Docker.
Step 0: Installing Docker on Windows
Just download the executable and follow the instructions to enable WSL2 on Windows. I do not cover the basics of Docker as they are everywhere. I just want to explain how I solved my problems.
Step 1: Getting Composer to install dependencies
Containers can be used in two ways.
- As a single process that runs to be used as a tool
- As a fully build application service
During development we use containers more as tools. Now lets say I have PHP and Composer on my a PC, I will simply run composer install to install the dependencies but when using docker, you can get the composer container and have it run with the files available in your current directory.
Every docker container has a working directory which will be used as a working directory for the tool that you are using. When I run composer it runs in the current directory. How do I get a container to run with the files in the current directory? The answer is Mounted Volumes. You mount your current Windows directory as the working directory for composer container and the composer inside the container runs for the files inside that directory and since it is mounted, all changes made inside the container are reflected in your Windows file system.
Do not use volume mounts in Production. Ideally your application container must never change anything in the file system. There are several exceptions for this like Database Containers but here I am talking about a PHP application container. Use storage services like S3 for user generated files.
Now to run Composer inside my directory I will use
docker run --rm -v ${PWD}:/app composer installEverything after composer will be the arguments you usually use with composer. Lets talk about everything before it.
–rm is a flag used to dispose off the container after it completes executing
-v is used to mount volumes and ${PWD} is for current working directory in powershell
:/app is used to mount whatever is on the left of : to /app inside the container
You can find out the proper directories for the containers by looking at their documentation in Docker Hub or whichever repository you use to get the container.
Step 2: Running PHP scripts inside a container
After installing my dependencies I want to run a PHP script. How do I do it?
docker run --rm -v ${PWD}:/app -w /app php:8.0-cli php -vIt is a similar process like above but here I am using a new option -w to set my current working directory after running the container and I am also using container tag 8.0-cli
This is the format for container identification container_name:container_tag PHP is the official container name in Docker Hub and 8.0-cli is one of the numerous tags available. I personally never liked the default options available for PHP and build my own container with extensions I need for Laravel.
The primary disadvantage with building your own container from scratch is that the container size is huge and you have to optimize it to reduce the size and remove unwanted applications but I wanted a no-headache approach to development for now and will probably optimize it in future. I also just learned compiling PHP from source so I probably made a lot of mistakes when compiling specifically for production.
For this article I will use only the containers on Docker Hub may be I will put the code of my Dockerfile in here when I get confident enough.
Using the default PHP Development Server inside Laravel to serve the application.
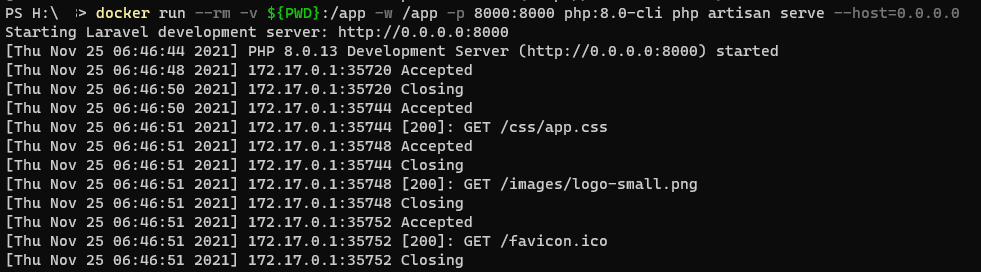
docker run --rm -v ${PWD}:/app -w /app -p 8000:8000 php:8.0-cli php artisan serve --host=0.0.0.0Another option is added in here that is -p which maps the port on the left of : on the host to the port on the right of the : inside the container and after serve I have added a –host option because requests will be coming from the host OS which is not localhost. As long as you don’t open your host 8000 to public you should be fine.
Work on your files using any IDE and the changes must reflect inside the container. If you are using Laravel before 8.0 I don’t think the dev server restarts for ENV or Config changes. You must restart the container for changes to be reflected.
Usually I use Ctrl+C to stop the development server but for some reason it isn’t triggering Kill signal to docker and to stop the container I have to use the Docker Desktop utility or Docker Commands. I will post here if I learn how to do this properly.
To run artisan commands while your server is running, open another tab and run
docker run --rm -v ${PWD}:/app -w /app php:8.0-cli php artisan route:listIt will take sometime to run as it has to create another container to run the command.
I hope I covered the basics if you are just getting into containers. I do want to explain in detail about everything and how its necessary to PHP developers but I am not sure whether my readers might get bored or will find it interesting. Let me know your thoughts in the comments.
Do note that the default containers in Docker Hub lack a lot of extensions that you might need. You must create your own container to install them properly. I will cover building containers in the next article.